I desperately need to do some blog catch up, so prepare to be having a month of contact inspiration.
This layout I created for Kaisercraft using the Documented Collection. I had been holding onto the photo for the perfect colours to enhance the sepia old photograph of my hubby's grandparents.
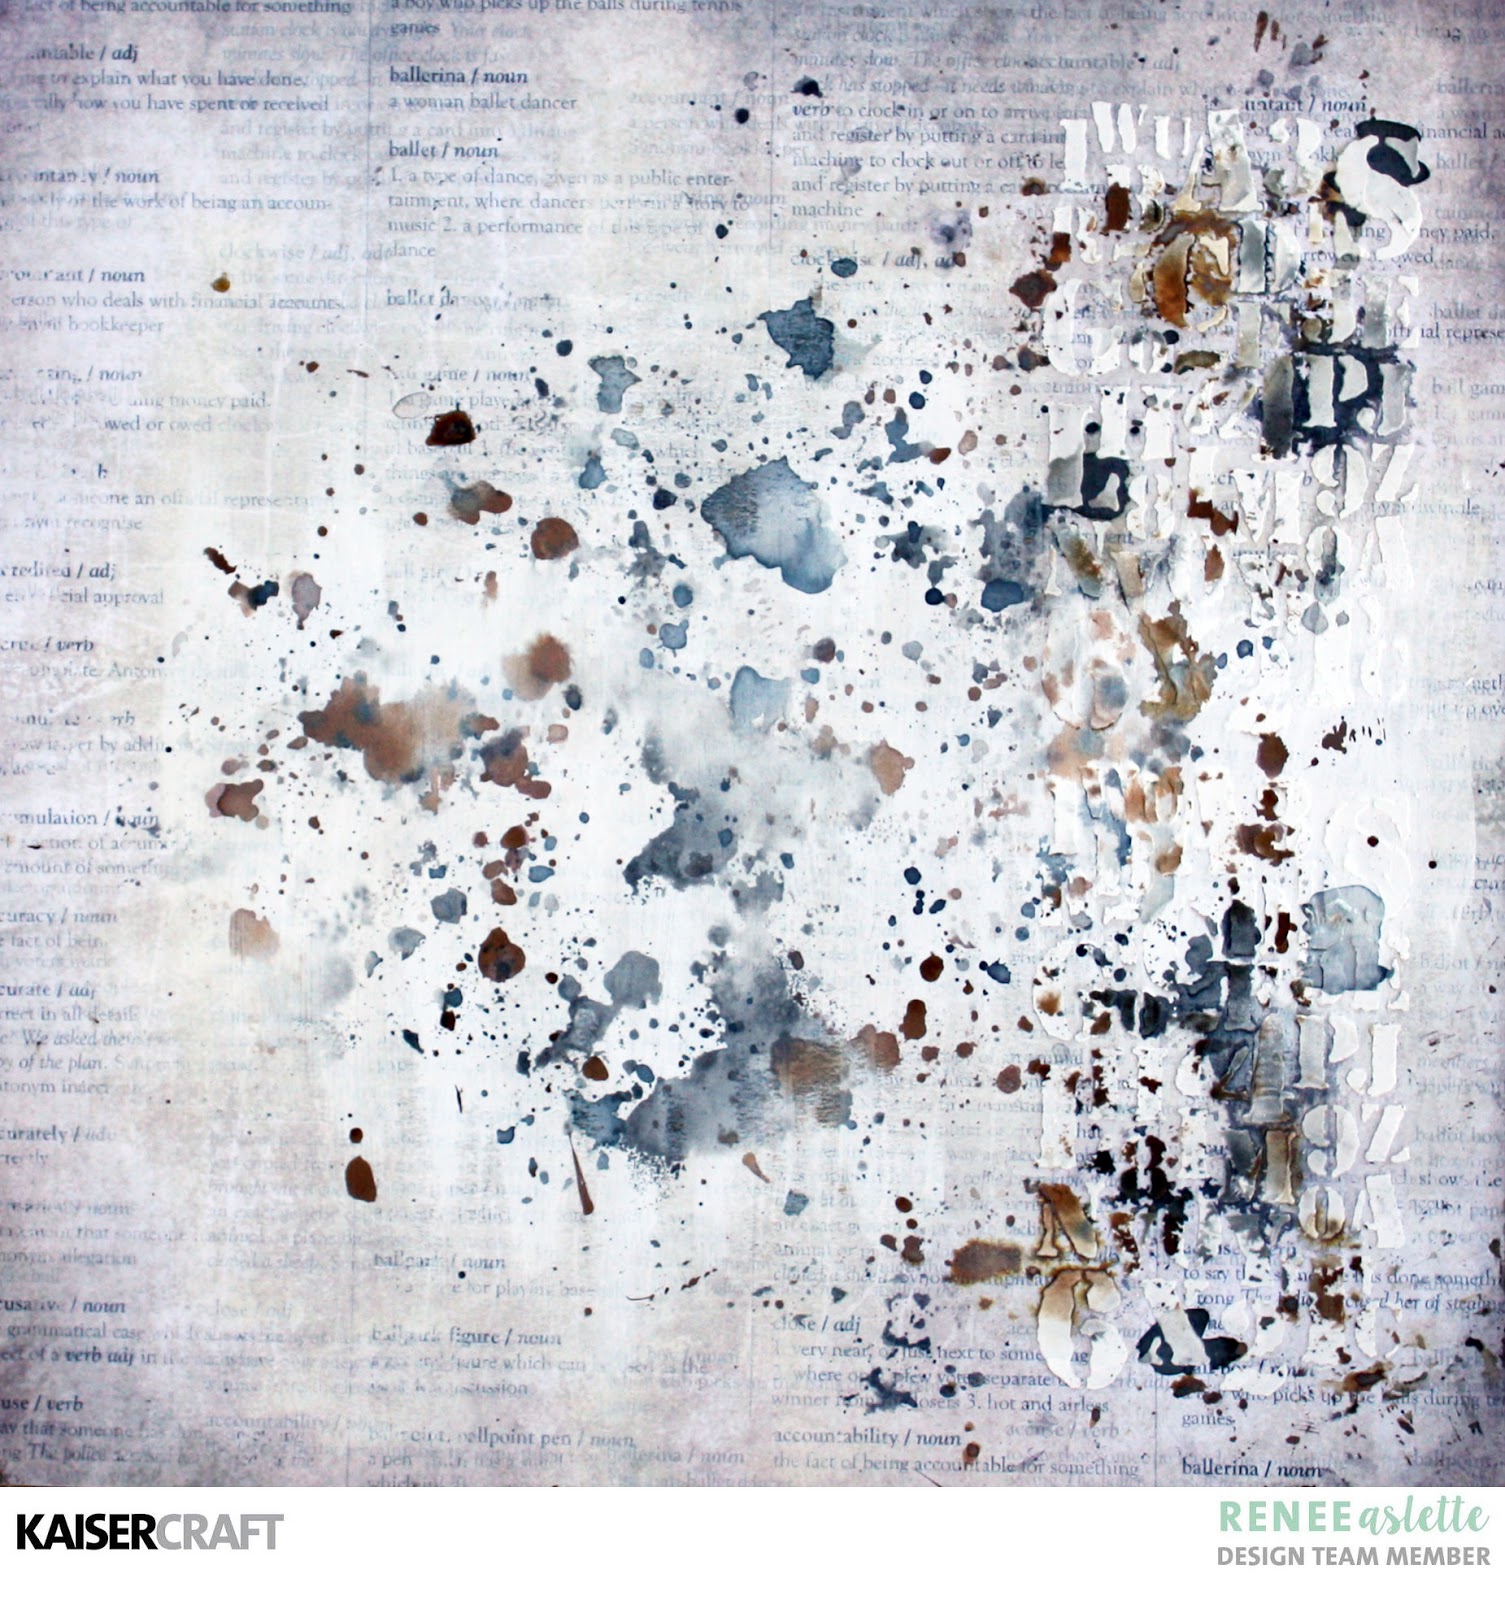
I love how this one turned out. Lots of background detail and I created my own background stamp using a Kaisercraft Alphabet stamp.
I used this stencil and whipped spackle first.
I allow this to dry naturally.
Using a dry brush, I add some White Gesso to the centre of the page and then also allow it to dry naturally.
To create the above affect, I use a combination of the IP719 Ink Pad – Black and a Tim Holtz Distress Ink Oxide – Vintage Photo. Using a piece of empty packaging plastic, I add some of the ink and then stamp in the section I would like it to go, focusing more on the areas where the gesso is and around where the photo will be.
Here is a close-up:
Using CS785 Clear Stamp – Typewriter Font and an acrylic block, add some letters in random spots on the block to create an alphabet stamp.
I wanted add another pop of colour, so I use IP723 Ink Pad – Vintage and the Ruler from CS319 Clear Stamp – Documented.
Here is a short video to show you how I created the stamping technique.
This is what it looked like after I completed the stamping.
Here is a close-up:
From here it was a matter of finishing with various Patterned Paper, Collectables and Die Cuts from the Documented Collection.
The Title “Memories Together” came from SS355 Sticker Sheet – Document Collection.
Tearing sheets of Patterned Paper give this layout a vintage feel.
I love this collection and I know you will too.
I hope you were inspired and thank you for stopping by.
Today I am sharing a layout I created using loads of Scrap FX goodies
and the 7 Dots Studio - Paint Chips Collection.
This is a layout of my youngest, Lucas. I used loads of Scrap FX products on this page.
I started with the Geometry Stencil on this 7 Dots Studio – Paint Chip Collection background.
I used it to stencil using some Tim Holtz Distress Oxide – Black Soot.
I then turned the stencil over and used it directly beside this image as a stamp, behind the photo.
I then used the Honeycomb Stamp to give the background some ink. This stamp will be a favourite of mine for sure. It’s so versatile.
I then mixed some Tim Holtz – Distress Oxide – Twisted Citron and Whipped Sparkle to use with the Crosswordsstencil to bring out some of the color in the background.
You can also see the Fractured Time Chipboard which was painted with White Gesso.
To finish the layout off, I added the title “Authenticity” and some of the BBQ Mesh Chipboard, which is also featured behind the photo matting as well.
Oh, and I cannot forget the Light Bulb Transparency. You get 9 of these in a sheet and they have different designs within each light bulb. How cool is that!!
I am also entering this layout into the 7 Dots Studio December Challenge. It's all about using 3 colours.
When this beauty arrived I was so excited. This planner is just so classic with rose gold foil accents. I knew Romantique would be the perfect collection to start with.
This is the inside of the cover. I have added embellishments to the pockets in the front left of the planner. These can come in useful at any time to help me plan. I used the Romantique Collection Collectables for this.
I cut out a dashboard to go behind the amazing transparency using the P2427 Eiffel. I then added a collectable that says “You are Amazing.” I cut out a butterfly from the Specialty Transparency, hole punched and added to the bottom D Ring.
I know from my own experience, that I don’t always get to use some of those amazing quotes on the Sticker Sheet, so why not use them on your planner? We all need some inspiration.
That beautiful Rose Collectable fitted perfectly on the page.
The second week of my planner seen a slightly different colour scheme, but still using the Romantique Collection. Another quote was perfect.
I layered the Collectables from this collection on this planner layout.
I also made a butterfly paper clip to take me to the page that I have a bill to be paid for, like a reminder. I made the paperclip by using a Collectable and then enforcing the paperclip between two layers with strong glue.
I really hope you have enjoyed this different way to use your Kaisercraft Collections.
See you next time.
Renee Aslette
Kaisercraft Products: Romantique Collection – P2427 Eiffel (Reverse) | PS507 Butterflies | SS351 Sticker Sheet | PP1032 6 x 6 Paper Pad | CT894 Collectables | SA054 Planner Navy with Rose Gold Foil Accent | AS251 Alpha Sticker Sheet – Ebony | AS253 Alpha Sticker Sheet – Ivory